SunTouch Heated Floor Thermostat Manual⁚ A Comprehensive Guide
This comprehensive guide will provide you with all the necessary information to understand and operate your SunTouch heated floor thermostat․ We will cover various models, including the SunStat Command, SunStat ConnectPlus, SunStat Core, SunStat Pro II, and SunStat Dial, along with their features, installation instructions, troubleshooting tips, and warranty details․ We’ll also address common issues and offer resources for further support․
Introduction
Welcome to the SunTouch Heated Floor Thermostat Manual․ This guide is your comprehensive resource for understanding and utilizing your SunTouch thermostat, a key component of your floor heating system․ Whether you’re a homeowner, a contractor, or a technician, this manual will provide you with the information you need to install, operate, and troubleshoot your SunTouch thermostat․ It covers various models, features, installation procedures, troubleshooting guides, and warranty information․ Let’s dive in and explore the world of SunTouch floor heating!
SunTouch Thermostat Models
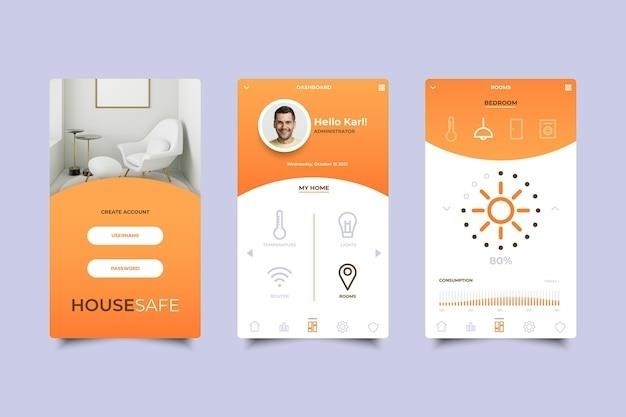
SunTouch offers a wide range of thermostats to suit different needs and preferences․ From basic models like the SunStat Dial to advanced options like the SunStat Command and SunStat ConnectPlus, there’s a thermostat designed for every home and heating system․ Each model boasts unique features, including programmable schedules, remote control capabilities, touchscreen interfaces, and compatibility with smart home systems; This manual will guide you through the features and functionalities of each model, helping you choose the best fit for your home․
SunStat Command Thermostat
The SunStat Command is a top-of-the-line programmable thermostat designed to control your floor heating system with ease and precision․ Its sleek, thin profile and large, readable font make it user-friendly, while the full-featured touchscreen provides a reliable and intuitive way to manage your heating․ The SunStat Command offers advanced features like remote access via the Watts Home mobile app, compatibility with voice commands, and a 7-day schedule that allows you to customize your heating preferences to match your lifestyle․
3․1 Features
The SunStat Command boasts an array of features designed to enhance your comfort and control over your floor heating system․ It offers floor temperature control with an optional air-sensing mode, a touchscreen display with customizable color themes, and a thin profile with a removable and paintable beauty ring to blend seamlessly with your decor․ The SunStat Command also provides easy-to-use programs and scheduling options for optimal comfort, as well as integration with home automation systems for a truly connected experience․
3․2 Important Safety Information
Before installing or operating your SunStat Command thermostat, please carefully review the following safety information․ This thermostat is designed for use with electric floor heating systems only, and the resistive load should not exceed 2000 watts (120 VAC) or 1000 watts (240 VAC)․ The thermostat is equipped with a ground fault circuit interrupter (GFCI), so ensure proper isolation of the line and load for safe operation․ Always consult a qualified electrician if you have any doubts or questions regarding installation or wiring․
3․3 Box Contents
The SunStat Command thermostat package contains the following items⁚ a SunStat Command thermostat unit, a floor sensor with a 10-foot extension, two screws for mounting the thermostat, four solderless connectors for copper wire, a user manual, and a warranty card․ The thermostat unit features a sleek design with a large touchscreen display, allowing for easy navigation and control of your floor heating system․ The floor sensor is essential for accurate temperature readings, ensuring optimal comfort and energy efficiency․
3․4 Installation
Installing the SunStat Command thermostat is a straightforward process․ Begin by mounting the bottom plate to the wall using the provided screws․ Next, install the floor sensor, ensuring it is placed between two heating wires within the heated area․ Connect the sensor wire to the thermostat, followed by the power lead and load wires․ The thermostat features a guided setup wizard that simplifies the process, making it easy to configure your desired settings․ Refer to the user manual for detailed instructions and diagrams for a successful installation․
3․5 Touch Screen Operation
The SunStat Command’s touchscreen interface offers a user-friendly experience․ Navigate through the menus using the touch controls to adjust temperature settings, create schedules, and access various features․ The large, readable font ensures easy visibility․ The display features multiple color themes for customization․ The thermostat’s built-in help feature provides guidance on each screen, making operation straightforward․ Refer to the user manual for detailed explanations of the touchscreen controls and navigation․
3․6 Troubleshooting Guide
If you encounter any issues with your SunStat Command thermostat, consult this troubleshooting guide for possible solutions․ Check the power supply and ensure proper wiring connections․ Verify the floor sensor is correctly installed and functioning․ If the display shows an error code, refer to the user manual for specific troubleshooting steps․ If the problem persists, contact SunTouch customer support for assistance․ They can provide further guidance and support to resolve any technical difficulties․
3․7 Warranty
The SunStat Command thermostat comes with a three-year limited warranty․ This warranty covers defects in materials and workmanship under normal use and conditions․ It does not cover damage caused by misuse, negligence, or improper installation․ To obtain warranty service, contact SunTouch customer support․ They will provide instructions on how to return the defective thermostat for repair or replacement․ Keep your original purchase receipt as proof of purchase for warranty claims․
SunStat ConnectPlus Thermostat
The SunStat ConnectPlus thermostat offers advanced features for controlling your floor heating system․ It allows you to remotely monitor and adjust your heating settings using a mobile app, giving you complete control over your home’s comfort․ With its user-friendly interface and intuitive design, the ConnectPlus makes managing your floor heating system easier than ever․ This thermostat is a great choice for those who value convenience and want to optimize energy efficiency․
4․1 Features
The SunStat ConnectPlus thermostat boasts a range of features designed to enhance your heating experience․ These features include remote access via a mobile app, allowing you to control your floor heating from anywhere․ It also offers a user-friendly touchscreen interface with multiple color themes, making it easy to adjust settings and monitor energy usage․ The ConnectPlus is compatible with voice commands for hands-free operation, and it provides comprehensive help screens to guide you through its functionalities․
4․2 Installation
Installing the SunStat ConnectPlus thermostat is a straightforward process; Begin by locating a suitable spot for the thermostat, ensuring it’s easily accessible and within range of your Wi-Fi network․ Next, prepare the mounting location by installing the bottom plate․ Carefully install the floor sensor, following the instructions provided․ Proceed to connect the wires according to the wiring diagram, ensuring proper polarity․ Finally, finish the installation by securely mounting the ConnectPlus thermostat to the bottom plate․
4․3 Touch Screen Operation
The SunStat ConnectPlus thermostat features an intuitive touchscreen interface for easy navigation and control․ The display provides clear information about the current temperature, setpoint, and system status․ You can easily adjust the temperature, program schedules, and access advanced settings through the touchscreen menu․ The thermostat also offers the ability to monitor energy usage and receive notifications through the mobile app․
4․4 Troubleshooting Guide
If you encounter any issues with your SunStat ConnectPlus thermostat, refer to the troubleshooting guide in the user manual․ Common problems include temperature fluctuations, communication errors, and system malfunctions․ The guide provides detailed steps for addressing these issues, including checking connections, restarting the thermostat, and updating the firmware․ If the problem persists, contact SunTouch customer support for further assistance․
4․5 Warranty
Your SunStat ConnectPlus thermostat comes with a three-year warranty from the date of purchase․ This warranty covers defects in materials and workmanship under normal use and conditions․ It does not cover damage caused by misuse, neglect, or improper installation․ For warranty claims, contact SunTouch customer support and provide your purchase information and a description of the issue․
SunStat Core Thermostat
The SunStat Core thermostat is a simple and reliable option for controlling your electric floor heating system․ It features a sleek design, easy-to-use interface, and a three-year warranty․ The SunStat Core allows you to set your desired floor temperature and includes a built-in ground fault circuit interrupter (GFCI) for added safety․ This model is perfect for those who want a straightforward solution for managing their floor heating without the added complexity of smart features․
5․1 Features
The SunStat Core thermostat boasts a range of features designed for simplicity and user-friendliness․ It offers floor temperature control, a thin profile for a sleek look, and a straightforward interface for easy operation․ The SunStat Core also comes with a three-year warranty, providing peace of mind and ensuring reliable performance․ Its intuitive design makes it perfect for those seeking a basic yet reliable thermostat for their floor heating system․
5․2 Installation
Installing the SunStat Core thermostat is a straightforward process․ Begin by mounting the bottom plate securely to the desired location․ Next, install the SunStat sensor, ensuring it is placed in a representative area within the heated zone․ Connect the thermostat wiring, adhering to the color-coded terminals․ Finally, test the thermostat to ensure proper operation․ It is recommended that a qualified electrician handle the installation, as electrical expertise is required for safe and correct wiring․
5․3 Touch Screen Operation
The SunStat Core thermostat features a user-friendly touch screen interface․ Navigating the menu is simple, with clear icons and intuitive controls․ You can adjust the desired floor temperature, set schedules for automatic heating, and monitor energy consumption․ The touch screen provides helpful prompts and guidance, making it easy to understand the various settings and options․ The thermostat also includes a “Help” feature accessible from every screen, providing additional assistance if needed․
5․4 Troubleshooting Guide
If you encounter any issues with your SunStat Core thermostat, refer to the troubleshooting guide included in the user manual․ Common problems include a lack of heating, inconsistent temperature control, or error codes displayed on the screen․ The guide provides step-by-step instructions for resolving these issues, covering aspects like checking connections, resetting the thermostat, and troubleshooting the floor sensor․ If the problem persists, contact SunTouch customer support for further assistance․
5․5 Warranty
The SunStat Core thermostat comes with a three-year limited warranty․ This warranty covers defects in materials and workmanship under normal use and conditions․ To make a claim under the warranty, you will need to contact SunTouch customer support․ They will provide you with instructions on how to return the defective thermostat for repair or replacement․ The warranty does not cover damage caused by misuse, neglect, or improper installation․ For complete warranty details, refer to the user manual or the SunTouch website․
SunStat Pro II Thermostat
The SunStat Pro II thermostat is a versatile model designed to control both 120 VAC and 240 VAC resistance floor heating systems․ It features an easy setup wizard and a pre-programmed schedule for quick and convenient operation․ The thermostat also includes a built-in GFCI for added safety․ With its user-friendly interface and comprehensive functionality, the SunStat Pro II provides reliable temperature control for your floor heating system․
6․1 Features
The SunStat Pro II thermostat offers a range of features to enhance your floor heating experience․ These include⁚
- Programmable operation⁚ Set your desired heating schedule to optimize energy efficiency and comfort․
- Easy setup wizard⁚ Simplify the initial configuration process with guided steps․
- Built-in GFCI⁚ Ensure electrical safety with a ground fault circuit interrupter․
- Compatible with 120 VAC and 240 VAC systems⁚ Provide versatility for different floor heating setups․
6․2 Installation
Installing the SunStat Pro II thermostat is a straightforward process․
- Start by mounting the thermostat to a suitable location, ensuring proper clearance for wiring connections․
- Connect the power supply to the thermostat, following the wiring diagram provided in the manual․
- Attach the floor sensor to the designated area in your floor heating system․
- Complete the wiring connections, ensuring all wires are securely fastened and properly labeled․
- Finally, turn on the power supply and test the operation of the thermostat to confirm a successful installation․
6․3 Troubleshooting Guide
If you encounter issues with your SunStat Pro II thermostat, consult the following troubleshooting guide⁚
- Verify that the power supply is connected and functioning properly․
- Inspect the wiring connections for any loose or damaged wires․
- Check the floor sensor for proper placement and connection․
- Ensure the thermostat is set to the correct mode and temperature․
- If the problem persists, contact SunTouch customer support for further assistance․
6․4 Warranty
The SunStat Pro II thermostat is backed by a three-year limited warranty from SunTouch․ This warranty covers defects in materials and workmanship under normal use and conditions․ It does not cover damage caused by misuse, neglect, or improper installation․ To obtain warranty service, contact SunTouch customer support or visit their website for further details and instructions․
SunStat Dial Thermostat
The SunStat Dial thermostat offers a simple and straightforward approach to controlling your floor heating system․ This model is designed for basic operation, featuring a dial knob for adjusting the temperature․ While it lacks the advanced features of programmable thermostats, it provides reliable temperature control with a user-friendly interface․
7․1 Features
The SunStat Dial thermostat offers a simple and straightforward approach to controlling your floor heating system․ This model is designed for basic operation, featuring a dial knob for adjusting the temperature․ It includes a built-in ground fault circuit interrupter (GFCI) for safety․ The thermostat is compatible with both 120 VAC and 240 VAC resistive floor warming systems, providing flexibility for various installations․
7․2 Installation
Installing the SunStat Dial thermostat is a relatively simple process․ Start by locating a suitable spot for the thermostat, ensuring it’s easily accessible and away from any moisture sources․ The installation manual provides detailed instructions for mounting the thermostat to the wall․ Connect the power supply, floor sensor, and heating system wires according to the wiring diagram provided․ After ensuring all connections are secure, test the thermostat to verify proper operation․
7․3 Troubleshooting Guide
If you encounter any issues with your SunStat Dial thermostat, refer to the troubleshooting guide in the manual․ Common problems include a lack of heating, incorrect temperature readings, or faulty sensor connections․ The guide provides step-by-step instructions for addressing these issues, including checking wiring, replacing the sensor, or resetting the thermostat․ If the problem persists, contact SunTouch customer support for assistance․
7․4 Warranty
The SunStat Dial thermostat comes with a limited warranty that covers defects in materials and workmanship for a specific period․ To activate the warranty, you must register your product with SunTouch within a certain timeframe․ The warranty does not cover damage caused by misuse, neglect, or improper installation․ For details on the warranty period and coverage, refer to the SunStat Dial thermostat manual․