Bissell QuickSteamer Instructions
This guide provides information on assembling‚ operating‚ maintaining‚ and troubleshooting your Bissell QuickSteamer. Please read it carefully before using your cleaner. Pay particular attention to the product diagram‚ assembly instructions‚ and part names. Locate and organize all parts before assembly.
Introduction
Welcome to the world of BISSELL QuickSteamer Lightweight Deep Cleaning! We are thrilled you chose our product to help keep your home clean and fresh. This comprehensive guide will equip you with all the information you need to assemble‚ operate‚ maintain‚ and troubleshoot your BISSELL QuickSteamer. Our goal is to ensure you get the utmost satisfaction from your purchase.
The BISSELL QuickSteamer is a versatile cleaning system designed to tackle a wide range of cleaning tasks. Whether you’re dealing with tough stains on carpets‚ upholstery‚ or even hard floors‚ the QuickSteamer’s powerful cleaning action and ease of use make it a valuable addition to your home cleaning arsenal.
We encourage you to take some time to familiarize yourself with the information in this guide. By understanding the features and proper usage of your QuickSteamer‚ you can maximize its cleaning performance and enjoy a cleaner‚ healthier home.

Safety Instructions
Your safety and the safety of others are our top priority. Please read and understand these safety instructions before using your BISSELL QuickSteamer. Failure to follow these instructions could result in fire‚ electric shock‚ or injury.
WARNING⁚ To reduce the risk of fire‚ electric shock‚ or injury⁚
- Connect to a properly grounded outlet only. See grounding instructions in this manual.
- Do not use outdoors or on wet surfaces.
- Do not allow to be used as a toy. Close supervision is necessary when used by or near children.
- Do not use on any surface that is damaged‚ torn‚ or frayed.
- Do not use on delicate fabrics or surfaces that may be damaged by heat or moisture.
- Do not use to clean flammable or combustible materials.
- Do not use on areas that are exposed to open flames or heat.
- Do not use on areas that are wet or damp.
- Do not use on areas that are covered in ice or snow.
- Do not use on areas that are covered in oil or grease.
- Do not use on areas that are covered in paint or other finishes.
Always unplug the QuickSteamer from the electrical outlet when not in use‚ before cleaning‚ or performing maintenance.
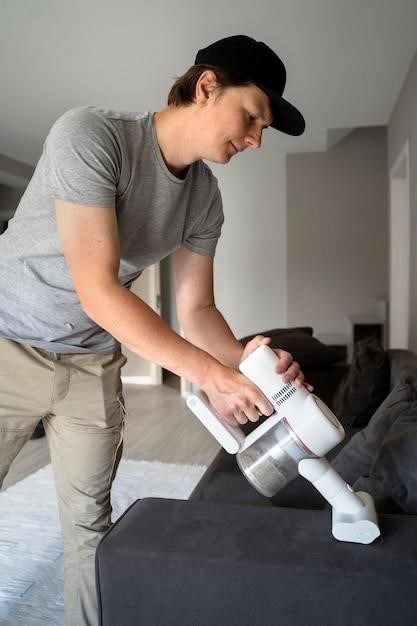
Product View
Familiarize yourself with the parts of your Bissell QuickSteamer; Understanding the different components will make assembly‚ operation‚ and maintenance easier.
QuickSteamer Handle Assembly⁚ This is the top portion of the cleaner that you hold while operating it. It includes the trigger for dispensing cleaning solution‚ the power switch‚ and the cord wrap.
Cross Action Brush⁚ Located at the bottom of the cleaner‚ this brush is designed to agitate carpets and rugs‚ lifting embedded dirt and stains.
Clean/Solution Tank⁚ This tank holds the cleaning solution‚ which is dispensed onto the carpet with the trigger.
Collection Tank⁚ This tank collects the dirty water and debris as you clean. It is important to empty this tank after each use.
Hard Floor Tool (select models)⁚ This tool is specifically designed for cleaning hard floors. It attaches to the QuickSteamer and allows for efficient cleaning of surfaces like tile‚ wood‚ and laminate.
Other Accessories (may vary by model)⁚ Your QuickSteamer may come with additional accessories‚ such as a upholstery tool‚ a crevice tool‚ or a dusting brush. Refer to your user manual for a complete list of accessories.
Assembly
Assembling your Bissell QuickSteamer is a straightforward process. Refer to the illustrated instructions in your user manual for detailed guidance. Here’s a general overview⁚
Attach the Handle Assembly⁚ Align the handle assembly with the base of the cleaner and securely snap it into place. Ensure a firm connection to avoid accidental detachment during use.
Connect the Power Cord⁚ The power cord is typically attached to the handle assembly. Plug the cord into a grounded outlet.
Attach the Hard Floor Tool (if applicable)⁚ If your QuickSteamer model includes a hard floor tool‚ hook it onto the base of the cleaner. It will likely have a designated latch or clip for secure attachment.
Install any Additional Accessories⁚ If your cleaner came with additional accessories‚ such as an upholstery tool or a crevice tool‚ follow the instructions in your user manual to attach them.
Inspect for Secure Connections⁚ Once assembled‚ check all connections to ensure they are secure. Give the handle assembly a gentle pull and the hard floor tool a slight tug to ensure stability.
Operation
Operating your Bissell QuickSteamer is simple and efficient. Here’s a step-by-step guide⁚
Prepare the Cleaning Solution⁚ Fill the cleaning solution tank with the appropriate amount of Bissell 2X cleaning solution and hot (not boiling) tap water. Refer to your user manual for the specific solution-to-water ratio for your model.
Plug in the Cleaner⁚ Connect the power cord to a grounded outlet.
Turn On the Cleaner⁚ Locate the power switch on your QuickSteamer and turn it on.
Select the Cleaning Mode⁚ Some models have multiple cleaning settings. Choose the appropriate setting for the type of surface you’re cleaning.
Begin Cleaning⁚ Move the QuickSteamer back and forth over the carpet or upholstery‚ allowing the rotating brushes to agitate the fibers. Apply even pressure but avoid pressing too hard.
Release the Cleaning Solution⁚ Press the trigger on the handle to release the cleaning solution onto the surface.
Empty the Dirty Water Tank⁚ When the dirty water tank is full‚ detach it and empty the contents into a sink or designated container. Rinse the tank and reattach it to the cleaner.
Continue Cleaning⁚ Repeat steps 5-7 until the entire area is clean;
Maintenance and Care
Regular maintenance is essential to keep your Bissell QuickSteamer performing at its best. Here’s a breakdown of important maintenance tasks⁚
Empty and Clean Tanks⁚ After each use‚ empty the dirty water tank and rinse it thoroughly. Empty the clean water tank and rinse it as well. Allow both tanks to air dry completely before reattaching.
Clean the Brushes⁚ Remove any hair or debris from the rotating brushes. Use a small brush or a pair of scissors to remove stubborn particles. Rinse the brushes with water and allow them to air dry completely.
Clean the Nozzle⁚ Remove any debris from the nozzle. Use a toothpick or a small brush to clear any obstructions. Rinse the nozzle with water and allow it to air dry.
Check the Filters⁚ Refer to your user manual to locate and check the filters. Clean or replace the filters as recommended in the manual.
Store Properly⁚ Wrap the power cord securely around the cord hook. Store the QuickSteamer in a cool‚ dry place‚ away from direct sunlight or heat.
Avoid Harsh Chemicals⁚ Do not use harsh chemicals or cleaners on your QuickSteamer. Use only Bissell-approved cleaning solutions.
Regular Inspections⁚ Periodically inspect the QuickSteamer for any signs of damage or wear and tear. Replace any worn or damaged parts promptly.
Troubleshooting
Encountering issues with your Bissell QuickSteamer? Don’t worry‚ most problems can be easily resolved. Here are some common troubleshooting tips⁚
No Suction⁚ Check if the dirty water tank is full. If so‚ empty it. Also‚ ensure the filter isn’t clogged. Clean or replace the filter as needed. Make sure the hose‚ brush roll‚ and nozzle are free of any blockages or obstructions;
No Solution Dispensing⁚ Confirm that the cleaning solution tank is securely attached and filled with the appropriate solution. Check if the solution strainer or nozzle is clogged with debris and clean them accordingly. Make sure the trigger on the handle is being pressed properly to dispense the solution.
Brush Roll Not Rotating⁚ Start by unplugging the vacuum cleaner. Then‚ locate the brush belt access door and remove it. Lift the brush roll out of its housing and use scissors or your fingers to carefully remove any hair or debris that may have accumulated. After cleaning‚ reinstall the brush roll‚ ensuring it is secure and properly aligned. Finally‚ replace the brush belt access door.
Unit Not Turning On⁚ Firstly‚ check if the vacuum cleaner is plugged into a functioning power outlet with the appropriate voltage. Ensure the power switch is in the “on” position. If the unit still doesn’t turn on‚ there may be an electrical issue. Contact Bissell customer service for assistance.
Water Leaking⁚ If water leaks from the unit‚ check if the tanks are properly sealed and the caps are securely tightened. Make sure the hose connections are secure and there are no cracks or damage in the tanks or hoses.
If these troubleshooting steps don’t resolve the issue‚ consult your user manual or contact Bissell customer service for further assistance.
Customer Service
Bissell is committed to providing excellent customer support to ensure your satisfaction with your QuickSteamer. If you have any questions‚ concerns‚ or need assistance with your product‚ here are the ways you can reach out to their customer service team⁚
Phone⁚ Call Bissell Consumer Services directly at 1-800-263-2535. They are available to answer your questions and provide support during regular business hours.
Website⁚ Visit the Bissell website at www.bissell.com and navigate to their customer service section. You’ll find a comprehensive FAQ section‚ online resources‚ and the option to submit a service request form.
Social Media⁚ Connect with Bissell on their social media platforms‚ such as Facebook‚ Twitter‚ and Instagram. While social media is not typically used for immediate customer service‚ it can be a helpful channel for general inquiries or to share your experience with the product.
Email⁚ If you prefer written communication‚ Bissell provides an email address for customer service inquiries. You can find this email address on their website or contact them through the online service request form.
When contacting Bissell customer service‚ be sure to have your QuickSteamer’s model number and serial number readily available. This will help them quickly identify your product and provide the most relevant assistance.
Warranty
Bissell offers a limited one-year warranty on your QuickSteamer‚ covering defects in materials and workmanship. This warranty is effective from the date of purchase and applies only to the original purchaser.
The warranty does not cover normal wear and tear‚ damage caused by misuse‚ neglect‚ or unauthorized repairs‚ or damage resulting from the use of non-Bissell cleaning solutions.
To make a warranty claim‚ you will need to provide proof of purchase‚ such as a receipt or sales slip. You can contact Bissell customer service at 1-800-263-2535 or visit their website at www.bissell.com for instructions on how to file a claim.
Bissell may‚ at its discretion‚ repair or replace your QuickSteamer with a new or refurbished unit. If the product is no longer available‚ Bissell may offer a comparable product or issue a refund for the original purchase price.
This limited warranty gives you specific legal rights‚ and you may also have other rights that vary from state to state. For complete warranty details and exclusions‚ please refer to the user manual that came with your QuickSteamer or visit the Bissell website.